The Microsoft .NET Core Framework has built-in support for Dependency Injection and the ASP.NET Core projects use this feature by default. This feature is provided through Microsoft.Extensions.DependencyInjection NuGet package and can be used in other NET Framework projects as well.
In this blog post, we are going to use see how to use Dependency Injection in WPF application, and register an SQLite DbContext to the dependency framework service provider and see how it is injected in the object requiring the DbContext instance.
- What is Dependency Injection?
- Prerequisites
- Implementing Dependency Injection in WPF application.
- Step 1. Create the .NET Core WPF application.
- Step 2. Add the NuGet packages to the project.
- Step 3. Create a Data Folder and add DBContext and Model classes.
- Step 4. Modify App.xaml.cs class
- Step 5. Update the App.xaml
- Step 6. Add the following code in MainWindow.xaml Grid tag
- Step 7: Add the code in MainWindow.xaml.cs
- Step 8: Execute the application.
What is Dependency Injection?
Dependency Injection helps us to achieve the Inversion of Control (IoC) design principle and help in separating object creation and consumption. The Dependency Injection framework facilitates object creation, object lifetime maintenance, and supplying the required dependency at runtime.
Prerequisites
In this blog post, we are going to create a NET Core WPF application using the default template provided by Visual Studio 2019. The other tools and NuGet packages that the application requires are mentioned below:
- Tools:
- Visual Studio 2019 (v16.4) [download here]
- .NET Core SDK 3.1 [download here]
- NuGet Packages:
- Microsoft.Extensions.DependencyInjection
- Microsoft.EntityFrameworkCore.Sqlite
Implementing Dependency Injection in WPF application.
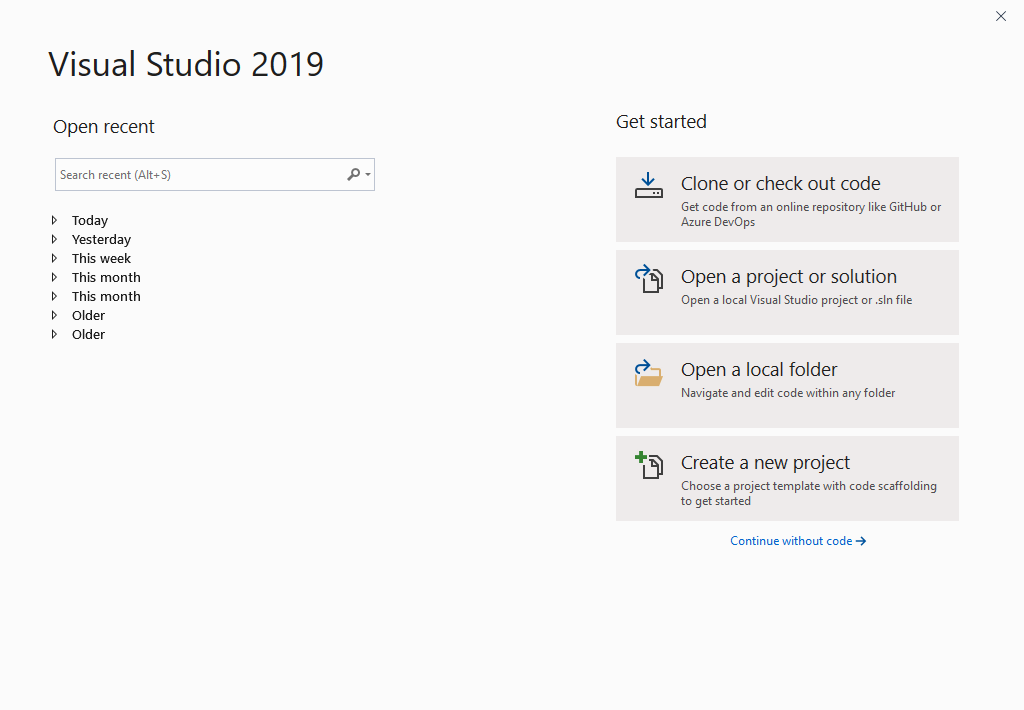
Step 1. Create the .NET Core WPF application.
Select “Create a new project” from Get Started dialog
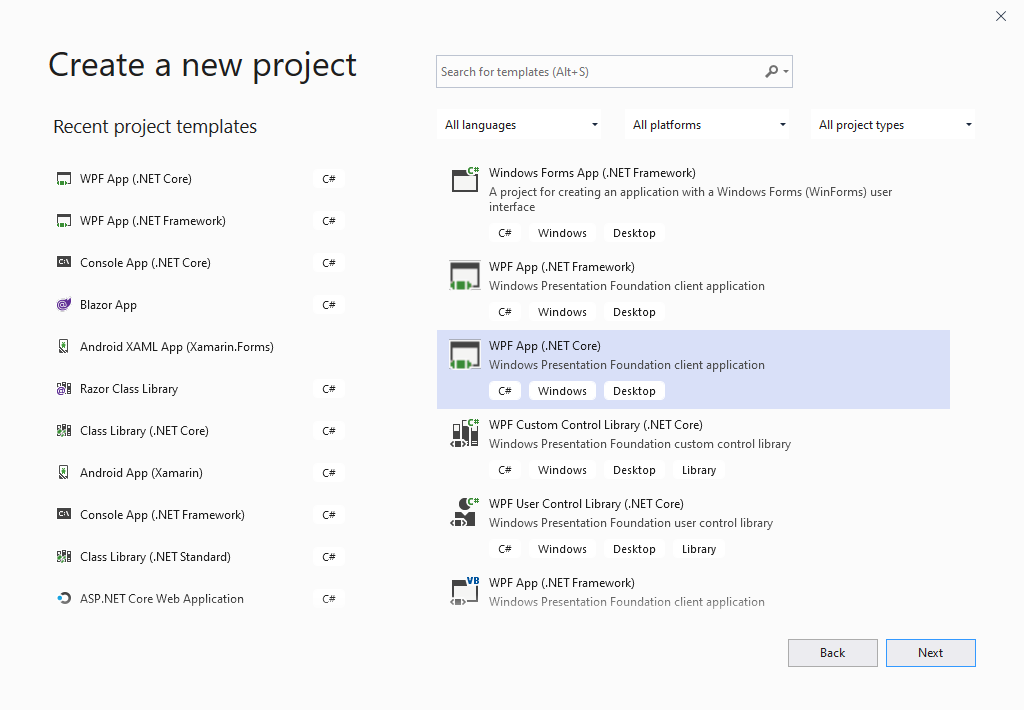
Select the “WPF App (.NET Core)” project template, from the “Create a new project” dialog and click “Next“.
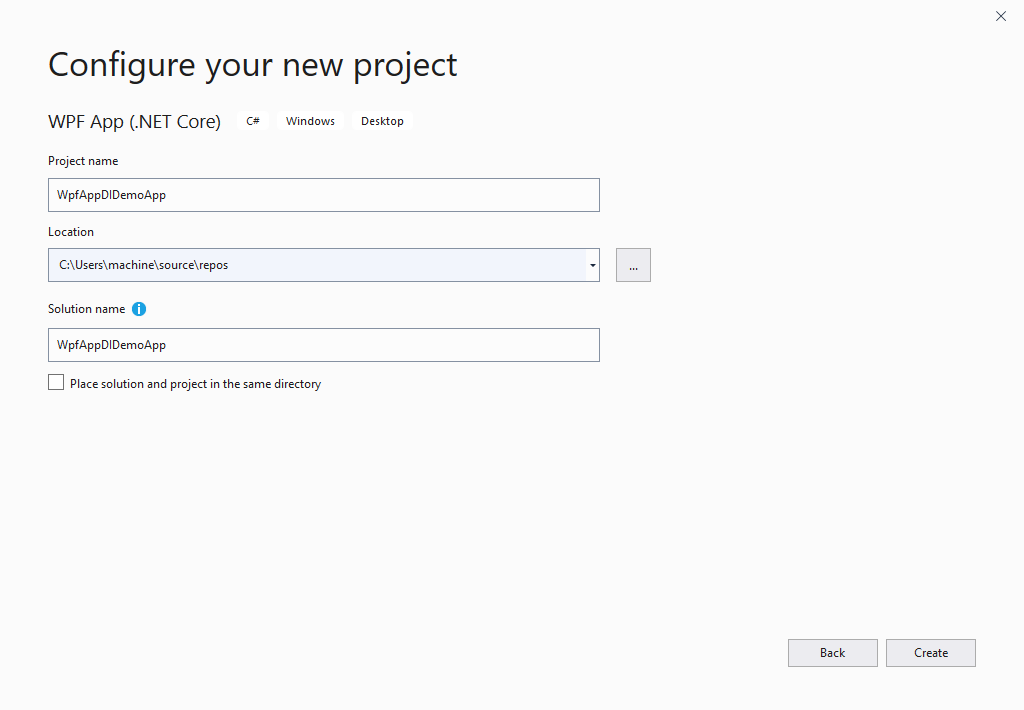
Give a name to the project and click on the “Create” button. The project will be created and loaded into Visual Studio.
Step 2. Add the NuGet packages to the project.
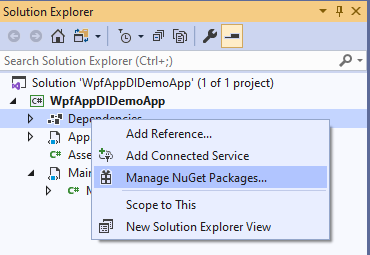
- Microsoft.Extensions.DependencyInjection

- Microsoft.EntityFrameworkCore.Sqlite

Step 3. Create a Data Folder and add DBContext and Model classes.
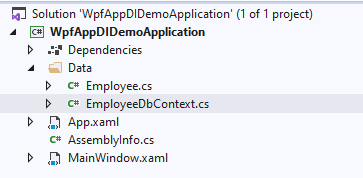
Employee.cs: This is the class that will act as the model.
 public class Employee
{
    public int Id { get; set; }
    public string FirstName { get; set; }
    public string LastName { get; set; }
}
EmployeeDbContext.cs: This is the DbContext class (Database Context) and will be used to register with the Dependency Injection Service Provider.
public class EmployeeDbContext : DbContext
{
    #region Contructor
    public EmployeeDbContext(DbContextOptions<EmployeeDbContext> options) : base(options)
    {
        Database.EnsureCreated();
    }
    #endregion

    #region Public properties
    public DbSet<Employee> Employee { get; set; }
    #endregion

    #region Overridden method
    protected override void OnModelCreating(ModelBuilder modelBuilder)
    {
        modelBuilder.Entity<Employee>().HasData(GetEmployees());
        base.OnModelCreating(modelBuilder);
    }
    #endregion


    #region Private method
    private List<Employee> GetEmployees()
    {
        return new List<Employee>
        {
            new Employee {Id = 100, FirstName ="John", LastName = "Doe"},
            new Employee {Id = 101, FirstName ="Nicole", LastName = "Martha"},
            new Employee {Id = 102, FirstName ="Steve", LastName = "Johnson"},
            new Employee {Id = 103, FirstName ="Thomas", LastName = "Bond"},
        };
    }
    #endregion
}
Step 4. Modify App.xaml.cs class
In this class, we have created a private method ConfigureServices(), and in this method, we are registering EmployeeDbContext and an instance of MainWindow class, so that their instances can be injected by the dependency framework when required.
The other method we have added is OnStartup(), and here we are asking the ServiceProvider so provide the instance of MainWindow class and after getting that we are displaying the MainWindow calling the Show() method.
public partial class App : Application
{
    private ServiceProvider serviceProvider;

    public App()
    {
        ServiceCollection services = new ServiceCollection();
        ConfigureServices(services);
        serviceProvider = services.BuildServiceProvider();
    }

    private void ConfigureServices(ServiceCollection services)
    {
        services.AddDbContext<EmployeeDbContext>(options =>
        {
            options.UseSqlite("Data Source = Employee.db");
        });

        services.AddSingleton<MainWindow>();
    }

    private void OnStartup(object sender, StartupEventArgs e)
    {
        var mainWindow = serviceProvider.GetService<MainWindow>();
        mainWindow.Show();
    }
}
Step 5. Update the App.xaml
Here remove the StartupUri and add the Startup event handler we created in App.xaml.cs, this will help to launch the MainWindow.
<Application x:Class="WpfAppDIDemoApplication.App"
             xmlns="http://schemas.microsoft.com/winfx/2006/xaml/presentation"
             xmlns:x="http://schemas.microsoft.com/winfx/2006/xaml"
             xmlns:local="clr-namespace:WpfAppDIDemoApplication"
             Startup="OnStartup">
    <Application.Resources>
    </Application.Resources>
</Application>
Step 6. Add the following code in MainWindow.xaml Grid tag
This code will create a DataGrid and help us to display the Employee table data on the User Interface.
 <Grid>
           <DataGrid Name="EmployeeDG" AutoGenerateColumns="False">
            <DataGrid.Columns>
                <DataGridTextColumn Header="Id" Binding="{Binding Id}"/>
                <DataGridTextColumn Header="First Name" Binding="{Binding FirstName}"/>
                <DataGridTextColumn Header="Last Name" Binding="{Binding LastName}"/>
            </DataGrid.Columns>
        </DataGrid>
    </Grid>
Step 7: Add the code in MainWindow.xaml.cs
Here we have modified the MainWindows constructor to accept the EmployeeDbContext parameter, and the parameter will be provided by the dependency framework during the runtime of the application.
The GetEmployee() uses the EmployeeDbContext reference to get the employees from the database and populate the ItemSource property of the DataGrid, and this, in turn, will help to display data on the user interface.
public partial class MainWindow : Window
{
    EmployeeDbContext dbContext;

    public MainWindow(EmployeeDbContext dbContext)
    {
        this.dbContext = dbContext;
        InitializeComponent();
        GetEmployees();
    }

    private void GetEmployees()
    {
        var employees = dbContext.Employee.ToList();
        EmployeeDG.ItemsSource = employees;
    }
}
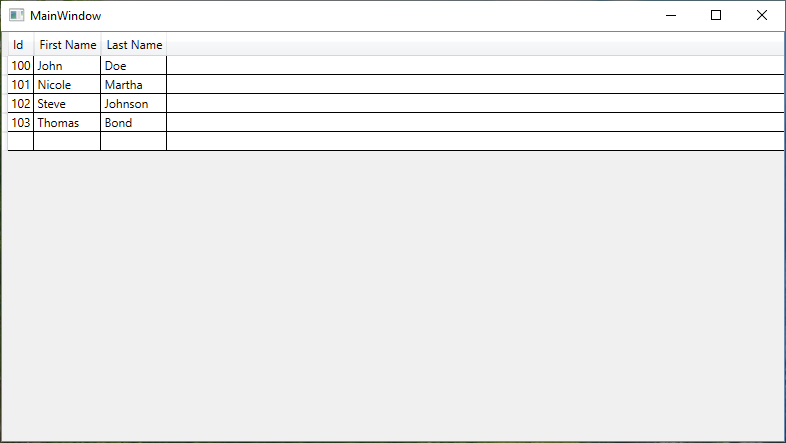
Step 8: Execute the application.
The output of the application will be as given in the snapshot.
Microsoft.Extensions.DependencyInjection NuGet package makes it really easy to register, maintain, and serve dependent objects at runtime with ease.
This concludes the post on how to use Dependency Injection in WPF application. I hope you find this post helpful, thanks for visiting, Cheers!!!
[Further Readings: How to use External Tool in Visual Studio 2019 | Top Features of Visual Studio 2019 Community Edition | Basic CRUD operations in Blazor using SQLite as the database | How to consume REST API in Blazor Application | Blazor Lifecycle Methods | A Simple way to Call Javascript in Blazor Application | Creational Design Patterns | Builder Design Pattern in C# | Prototype Design Pattern in C# | Top 5 Blazor Component Libraries | Abstract Factory Design Pattern in C# | Factory Method Pattern in C# | Singleton Design Pattern in C# | Introduction to Design Patterns | Microsoft C# Version History | Microsoft .NET Core Versions History | Microsoft .NET Framework Version History | Introduction to WPF in .NET Core ]