In this blog post, we will discuss SQLite Studio, a great little management tool, that helps us to easily create and manage SQLite databases. It is a free, cross-platform, portable (no installation required), open-source tool, that can be used without licensing issues even commercially.
The SQLite Studio comes with a list of features like SQL code editor, export and import data to and from various formats (like SQL, XML, JSON, etc) work with multiple databases, encrypted databases, SQL and DDL history, Data population for testing, and many more.
In this post, we will refer to how to install, know about its standard menu, create a sample test database, add table and records, execute a query, export and import database and table records.
Installation – Download, Unzip and Execute
The SQLite Studio is a portable tool that requires no installation. The user can directly download, unzip the downloaded folder and start using the tool. The tool can be download from the https://sqlitestudio.pl/ page.
The unzipped folder contains an “SQLiteStudio.exe” executable on a Windows machine. SQLiteStudio on Linux machine. Run the executable to start the studio. I am running version 3.2.1 on a Windows machine.
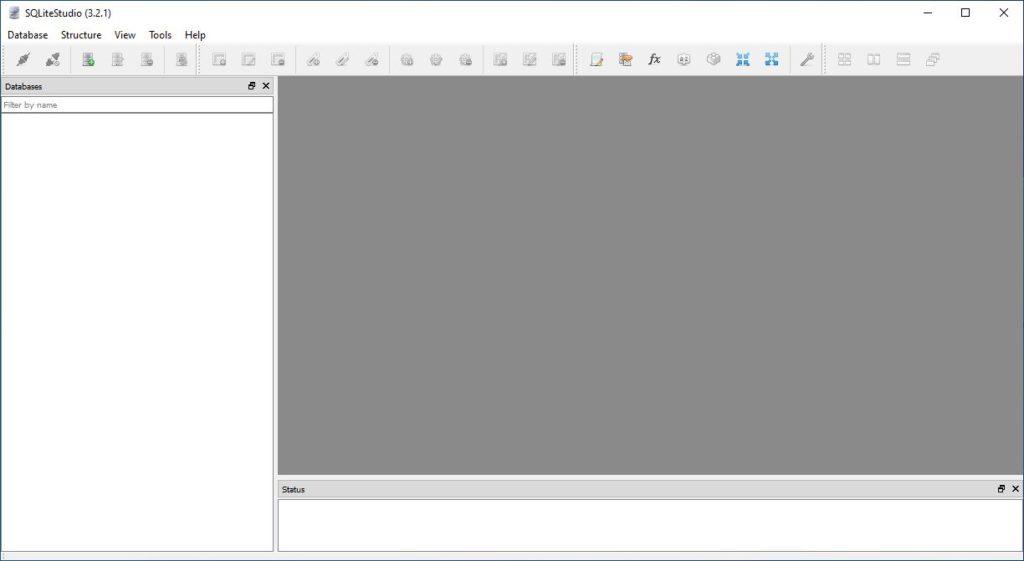
Standard Menus of SQLite Studio
The SQLite Studio provides a simple user interface with 5 menu options (at the time of writing the current version is: 3.2.1). Let us see what options each of them provide for the user.
Menu – Database
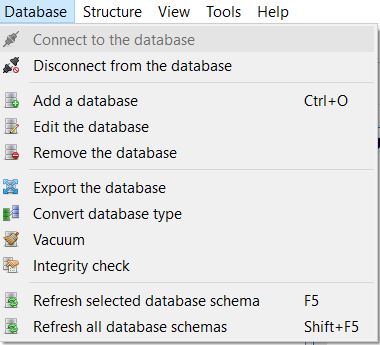
The Database menu option provides functionality on the database level and provides the user with an option to perform major operations like adding (creating), editing, removing a database. Connecting to an existing database, export the connected database to SQL, XML, JSON, PDF, HTML formats as well as to convert the database from one format to another like from SQLite3 to SQLCipher, performing integrity test, etc.
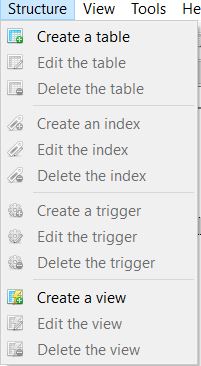
Menu – Structure
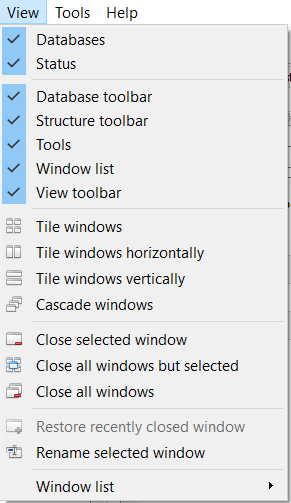
Menu – View
The View menu provides options related to the Studio layouts, toolbar, and windows management.
Menu – Tools
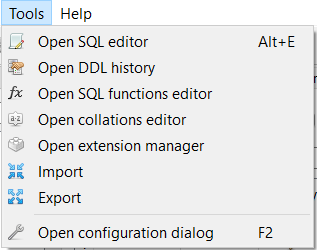
The Tools menu provides users with an option to open SQL editor, DDL history, SQL Function editor, Collations editor, Import table data, Export entire database, table, or a query result. As well as options to open Extension Manager and Configuration Editor where the user can configure the look and feel, shortcuts, code formatters details, and data editor values.
Menu – Help
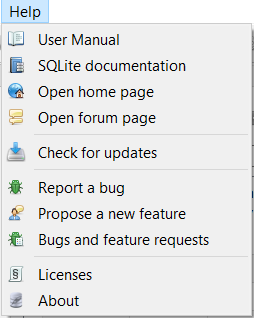
The Help menu provides links to the User manual, SQLite documentation, links to Studio’s home page, and forums to request a new feature, report bugs, and an option to check for updates, etc.
Add (Create) a database
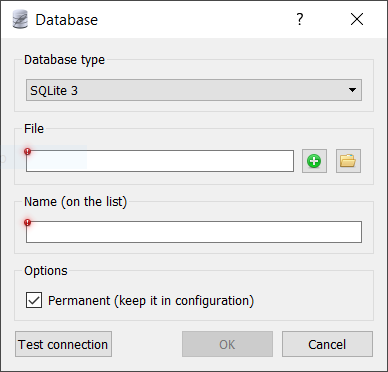
A database can be added (created) in the SQLite Studio in three ways, first is through the Database menu (Database > Add a database), second by using the shortcut key Ctrl + O keys, and third by clicking the “Add a database” icon on the toolbar, on doing so the Database dialog is presented to the user.
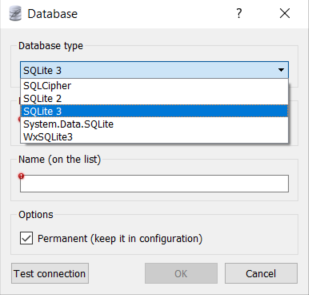
Here we have an option to select the Database type; available options in the current versions are SQLite 3, SQLite 2, SQLCipher, System.Data.SQLite and WxSQLite3. For our sample database, we will choose the default Database type i.e. SQLite3
Next is the File section, where we can either provide the name of the database file and click the Ok button to save (this will create a new database file, in the default SQLite Studio location) or we can browse by clicking the “+” button to select a location and save the file. We can also select an existing database. In either case, the database will be added to the Databases list window.
We can choose to provide an alias name for the database by providing a name in the Name (on this list) text box. This name will be used for display purposes in the Databases list window, the actual name of the database file will not be affected. Here we have given “test.db” as the database name.
If we want the database to be always available when the SQLite Studio has opened the check the “Permanent (keep it in configuration)” checkbox.
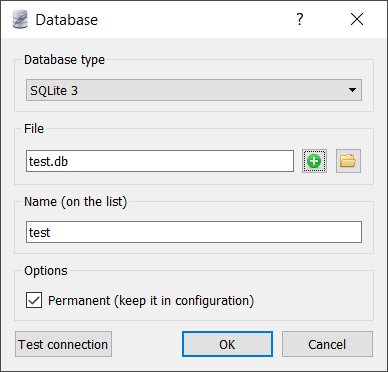
Here we have created a new database with the following values selected: SQLite3 as the Database Type, “test.db” as the File name, and test as the Name (on the list) as well as checking the Permanent (keep it in configuration) value checked.
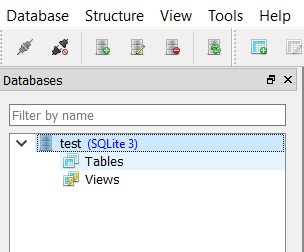
After clicking on the OK button, the database file is created and displayed on the Databases list window. Double click the database name to load the artifacts.
Adding a table
Now let us add a new table called Employee into our test database, with the following requirement.
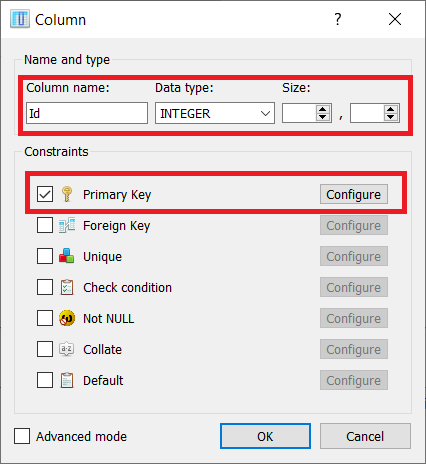
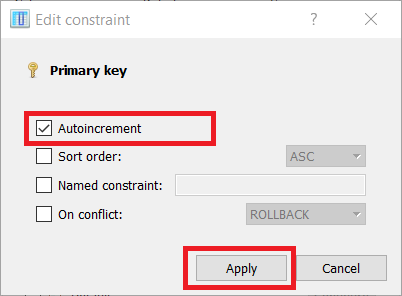
- Id: Integer, Primary Key, and Autoincrement.
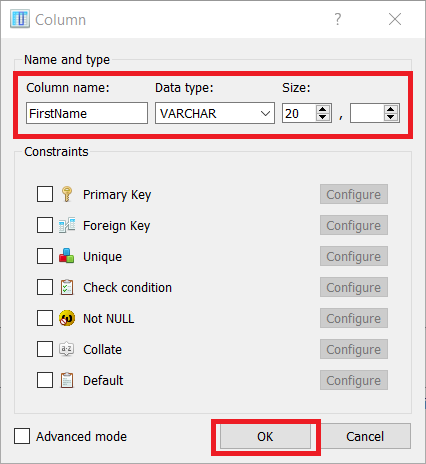
- FirstName: varchar(20)
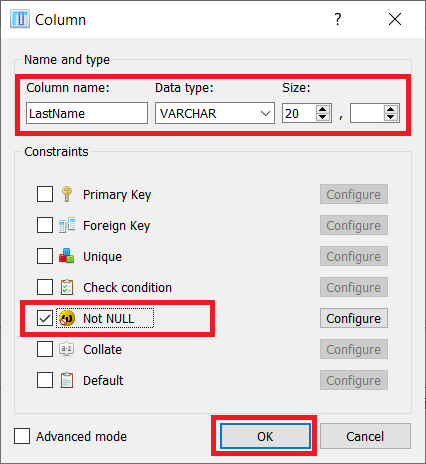
- LastName: varchar(20) and Not Null
A new table can be added in three possible ways, first, from the Structure menu (Structure > Create a table), second by clicking the “Create a table” icon on the toolbar, and third by right-clicking on the Tables in the Databases list window.
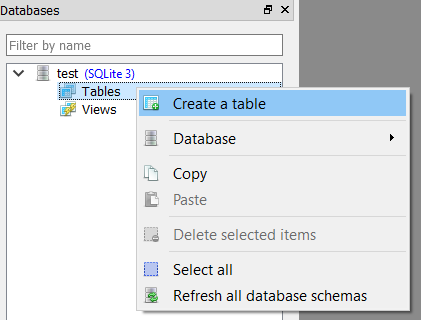
On selecting the Create a table option, we will be presented with the table details window, where we have an option to fill in the details using a form or by writing the DDL ourselves. Let us use the Form to fill in the details to create the table.
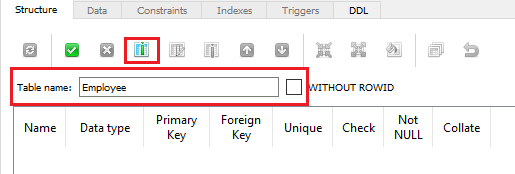
In the form, we will provide the Table name as Employee. Now let us add the first column Id details by clicking the Add-column icon, and fill the column name as Id, Data Type: as INTEGER and check the Primary Key option and then click the Configure button to open the Edit constraint dialog.
Here we will check the Autoincrement checkbox as per the column requirement and click on Apply and then the OK button on the Column dialog.
Next, we will add the second column FirstName again by clicking the Add column icon, with the following values, and click the OK button.
Next, is to add the last column LastName by following the same process.
All the column details will be displayed in the table Structure form. Next, we need to commit it to the database. The changes can be committed by clicking the “Commit structure changes“ icon.

Once we click the “Commit structure changes” icon, we will be displayed the “Queries to be executed” dialog, displaying the DLL statement that will be executed against the database, here we will click the OK button to apply the changes. A status message will also be displayed for our verification purpose in the status window.
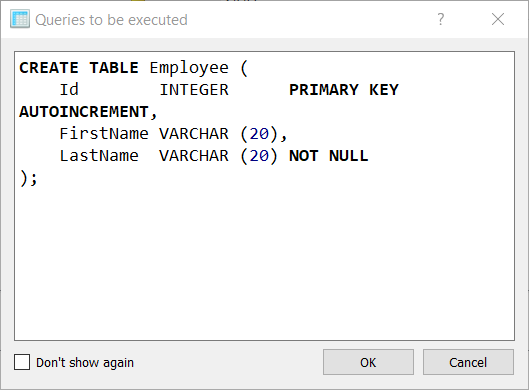
Once we apply the changes the table Employee will be added and displayed into the Test>Tables>Employee section in the Databases list window.
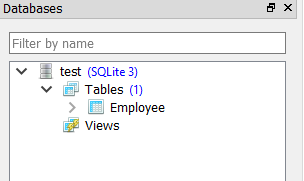
Add Records to Employee table
Now let us add a few records and we will do this by double-clicking the Employee table and selecting the Data tab. In this form, we will use the shortcut “Ins” button to insert a new record. (The user can choose to do the same using the “+” icon on the form or by selecting add multiple records at once from the drop-down next to the “+” Insert record icon.)
After inserting the required records, we commit the changes by pressing the “Commit” icon or by using the shortcut (Ctrl + enter)

Executing SQL Queries
In order to execute a SQL query against any database, the SQLite Studio provides a SQL editor. The same can be open from the Tools menu (Tools > Open SQL editor) or by pressing the shortcut key “Alt + E“.
The user can use the same Query Editor window for multiple databases just by changing the active database in the drop-down list.
Let us run a simple query in the editor to check the output. To execute the query we will press the F9 shortcut.
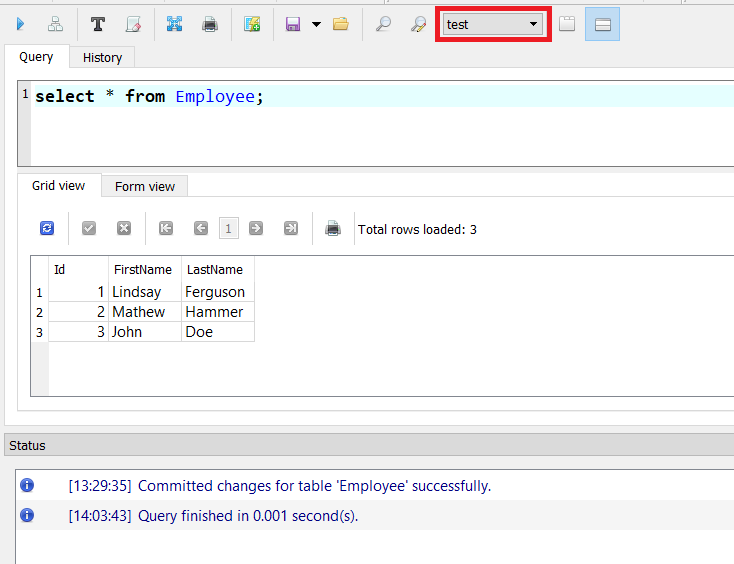
The output of the query is displayed in the Grid view and as a Form view, as well as the status of the query execution, is also displayed in the Status window.
Export database
Let us export the “Test.db” database as an SQL file. In order to export the database, we have three options first, is from the Tools menu (Tools > Export), second is to select “Export the database” from the Database menu and the third option is to right-click on the database name and select “Export the database” from the context menu.
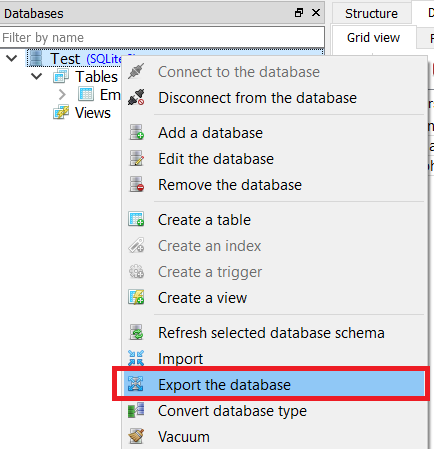
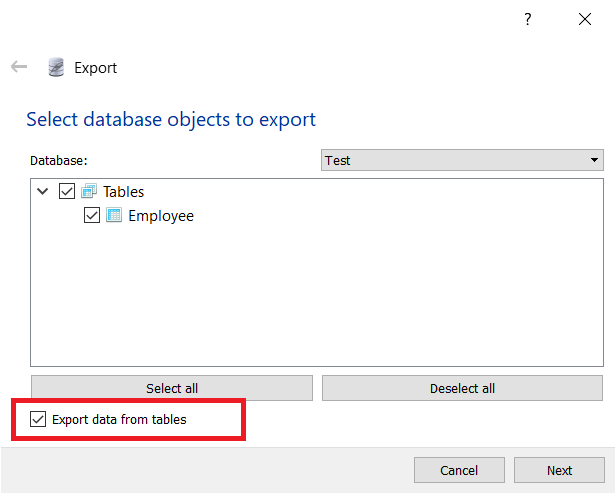
On selecting the menu, we are presented with the Export dialog, select the all the table that needs to be exported. If we want to export the table data as well then have to select the “Export data from tables” option, and click the Next button.
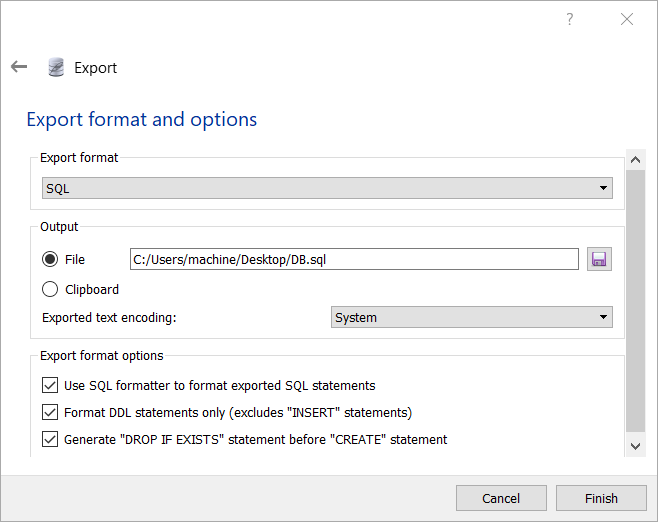
In the next section, we have an option to select the format for the exported file, here we can choose from the various options like HTML, JSON, PDF, SQL, and XML, here we will select the default SQL option.
We can select the output to be a file or just to export the content to the clipboard, here are all the option we have selected, they are all self-explanatory. We have named the file to be DB.sql. Click the Finish button to export the file.
The content to the DB.sql is as follows:
--
-- File generated with SQLiteStudio v3.2.1 on Thu Dec 3 00:09:27 2020
--
-- Text encoding used: System
--
PRAGMA foreign_keys = off;
BEGIN TRANSACTION;

-- Table: Employee
DROP TABLE IF EXISTS Employee;

CREATE TABLE Employee (
    Id        INTEGER      PRIMARY KEY AUTOINCREMENT,
    FirstName VARCHAR (20),
    LastName  VARCHAR (20) NOT NULL
);

INSERT INTO Employee (Id, FirstName, LastName) VALUES (1, 'Lindsay', 'Ferguson');
INSERT INTO Employee (Id, FirstName, LastName) VALUES (2, 'Mathew', 'Hammer');
INSERT INTO Employee (Id, FirstName, LastName) VALUES (3, 'John', 'Doe');

COMMIT TRANSACTION;
PRAGMA foreign_keys = on;
Export Table
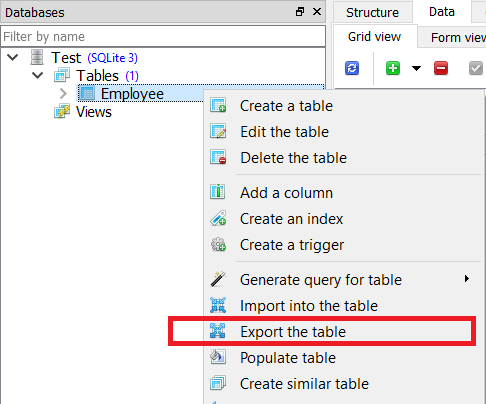
We can choose to export a single table as well without exporting the complete database. In order to export a table, right-click on the table name to be exported and select “Export the table” from the context menu.
The Export dialog will appear, we can select to export table data, indexes, and triggers. By default, all these options are checked.
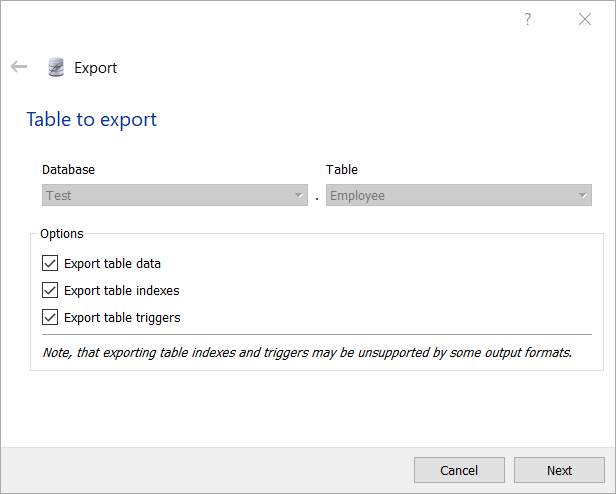
So we will continue by clicking the Next button, and move the next window which is similar to the export database option. Keeping all the options as below, we will click the Finish button.

As the name provided is DB.sql, following is the output of the exported file.
--
-- File generated with SQLiteStudio v3.2.1 on Thu Dec 3 00:24:00 2020
--
-- Text encoding used: System
--
PRAGMA foreign_keys = off;
BEGIN TRANSACTION;

-- Table: Employee
DROP TABLE IF EXISTS Employee;

CREATE TABLE Employee (
    Id        INTEGER      PRIMARY KEY AUTOINCREMENT,
    FirstName VARCHAR (20),
    LastName  VARCHAR (20) NOT NULL
);

INSERT INTO Employee (Id, FirstName, LastName) VALUES (1, 'Lindsay', 'Ferguson');
INSERT INTO Employee (Id, FirstName, LastName) VALUES (2, 'Mathew', 'Hammer');
INSERT INTO Employee (Id, FirstName, LastName) VALUES (3, 'John', 'Doe');

COMMIT TRANSACTION;
PRAGMA foreign_keys = on;
Import Data into a Table
The SQLite Studio also provides an option to import data into an existing table from a CSV file or using a Regular expression. Here will use a CSV file to import data into our Employee table. The content of the CSV file is as follows. Please note my CSV file contain the header information as well.
Id,LastName,FirstName
4,'Edwards', 'George'
5,'Howell', 'Rachel'
6,'Funke', 'Tobias'
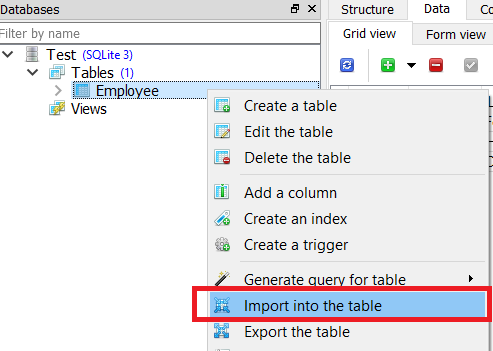
In order to import data into a table, right-click on the table name and select the “Import into the table” option or select the Tools menu and Import.
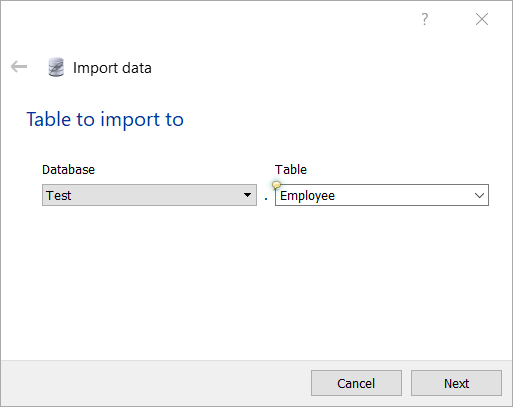
The import dialog is presented with the database and the table name selected. Click the Next button to continue.
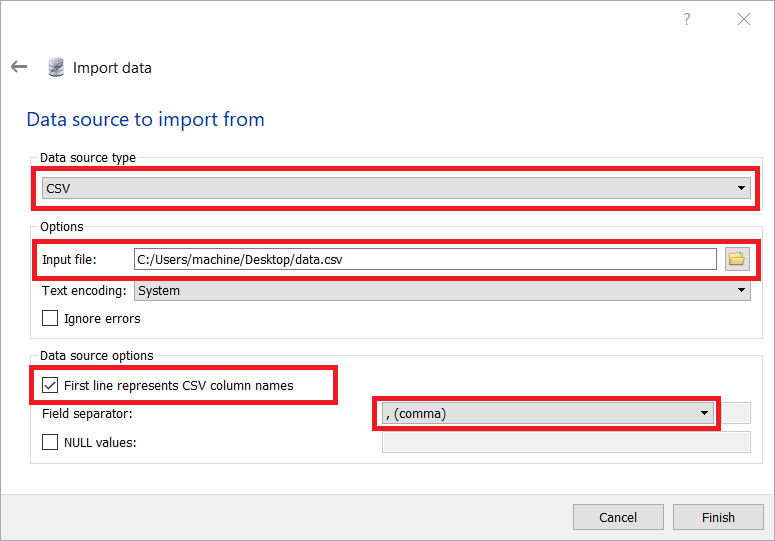
Here in the dialog we will select Data source type as CSV, browse and point to our input file, check the “First line represents CSV column names” option as our input file contain the column name and we want to ignore them, and finally select the Field separator as, (comma), and then click the Finish button. This will import all the data into the Employee tables. (Assuming all the data available in the file are correct)
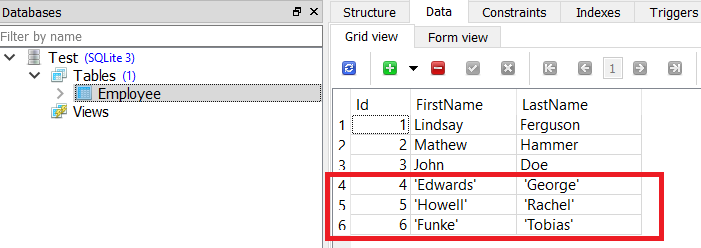
Let us refresh the Employee table data. Here all the data from the CSV file are imported successfully.
Style Configurator
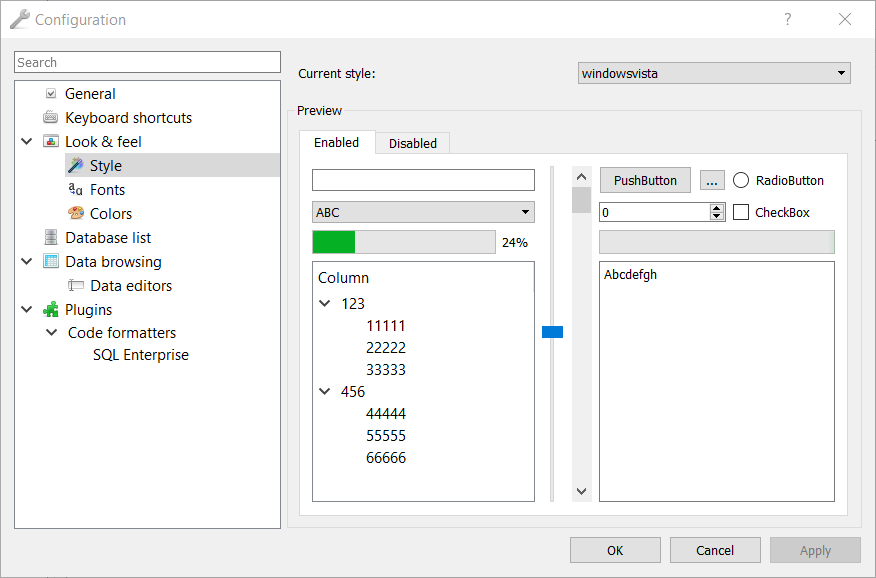
The SQLite Studio provides an option to change its look and feel, as well as to customize its shortcuts, Fonts, colors, Style (theme). The Style configuration dialog can be open from the Tools menu (Tools > Open configuration dialog) or by using the shortcut F2 key.
Conclusion
The SQLite Studio comes with a great number of features like populating a table with random data, function editor, DDL history, Extension manager. Exploring them would be of great help. All in all, it a great tool to manage SQLite databases with ease and is a must-have tool for the team.
The source code and other tools related details can be found on GitHub: https://github.com/pawelsalawa/sqlitestudio
I hope you found this post helpful. Thanks for visiting. Cheers !!!
[Further Readings: Adapter Design Pattern in C# | How to use Blazor EditForm for Model Validation | How to add a new profile in Windows Terminal | How to easily Customize Global Settings in Windows Terminal | How to add Git Bash to Windows Terminal Application | How to customize Windows Terminal Application | How to customize Windows Terminal Key Bindings | How to Install Windows Terminal in Windows 10 | Important Debugging Shortcuts of Visual Studio 2019 | How to publish a Blazor Server Application to IIS | Top 7 Visual Studio 2019 extensions for Web Projects | The difference in Blazor Server and WebAssembly Application ]